Is It Possible to Go Back to Sierra After Uploading Mojave to My Macbook Pro
Did you update to macOS Large Sur merely now wish you hadn't? Are you no longer interested in using macOS Big Sur on your Mac? Mayhap you installed it to effort out all new features and changes, but you're non happy with it due to app incompatibility, performance issues, or some other trouble that you haven't been able to resolve. In that case, you may be looking to downgrade to an older version of macOS, similar macOS Catalina or macOS Mojave. Fortunately, this is non a hard task, so long as you brand regular Fourth dimension Machine backups of your computer.
Early on adopters of macOS Big Sur or any major macOS software update in general would sometimes regret updating their device and may desire to roll back to the older version that was installed. The easiest mode to downgrade from macOS Big Sur is by formatting your Mac and then restoring it from a Time Car backup that was made prior to the installation of macOS Big Sur.
Looking to coil dorsum the software on your Mac to an older version? We're here to help. In this article, nosotros'll be guiding you through the steps to properly downgrade your Mac from macOS Big Sur to macOS Catalina or Mojave.
How to Downgrade macOS Large Sur to Catalina or Mojave
Warning:Before you go alee with any of the steps below, make sure yous already take a Time Machine fill-in that was made prior to installing macOS Big Sur. If y'all don't have a backup, yous volition not be able to downgrade, and doing this will but consequence in permanent loss of data since you'll exist formatting or erasing your drive during the process.
Apart from that, if you lot have any of import information or files that yous created after updating to macOS Big Sur, you'll need to manually transfer them to an external drive since this data won't exist restored from the Fourth dimension Machine backup. Once once more, practice not proceed if you don't take a backup.
- Commencement of all, connect the Time Machine drive to your Mac. This drive should contain the backup of your Mac that was fabricated prior to macOS Big Sur installation. You lot'll exist restoring your information from this drive.
- Now, reboot or restart your Mac. To exercise this, click on the Apple logo from the menu bar and choose "Restart" from the dropdown menu.\
- When your Mac reboots, immediately press and concord downwards the Command + R keys to boot your Mac into Recovery mode.
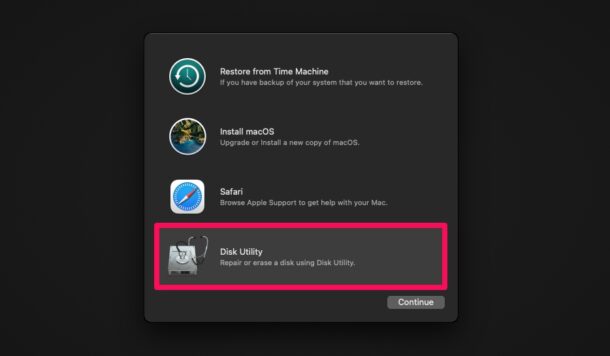
- Doing this will take you lot to the macOS Utilities screen. Here, click on "Disk Utility" to get started.
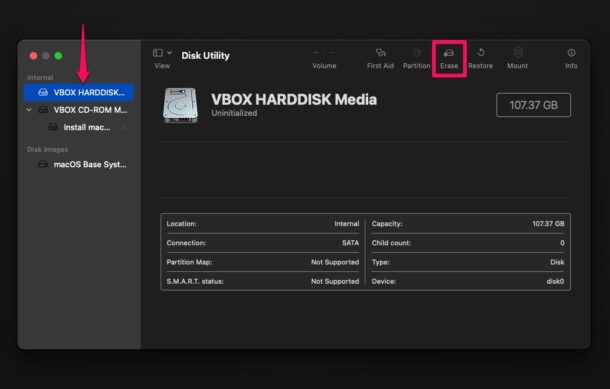
- Now, select the disk drive where macOS Big Sur is currently installed from the left pane and click on "Erase" as shown in the screenshot below.
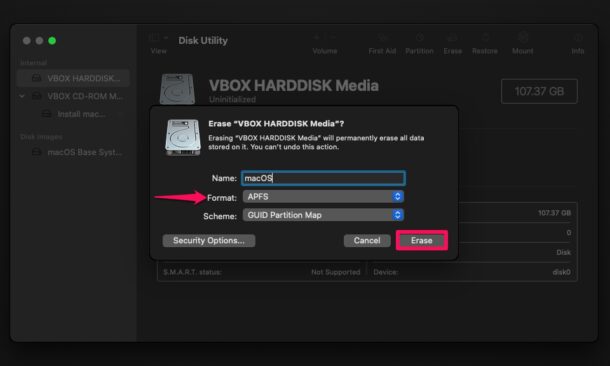
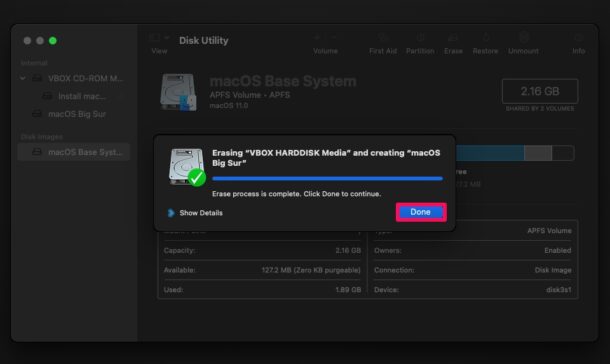
- This volition bring up the format options for the bulldoze. Enter a preferred proper name for the drive and so choose the file organisation format as either "Apple File System (APFS)" (if you lot're using a Mac with Solid State Drive) or "Mac OS Extended Journaled (HFS+)" (for Macs with mechanical and hybrid hard drives). Now, click "Erase" to ostend and format your Mac – THIS ERASES ALL DATA ON THE DRIVE, so don't do it unless you're admittedly certain that you lot have a backup!
- One time the drive is successfully formatted, yous'll see the following screen. Click on "Done" and exit Deejay Utility.
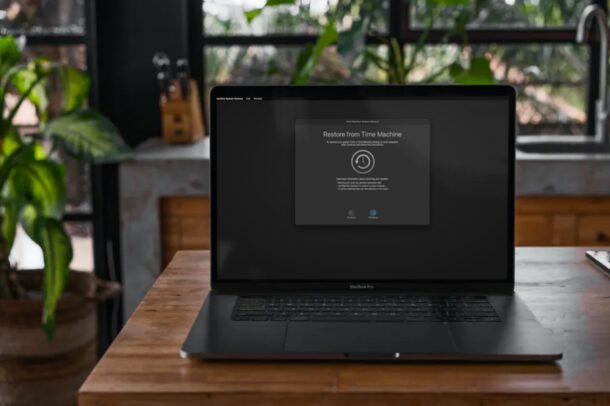
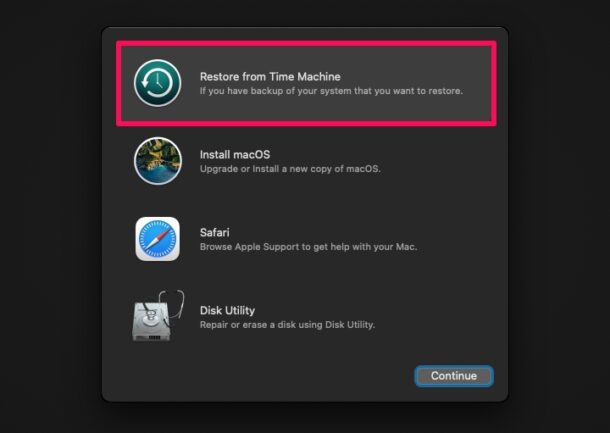
- Next, choose "Restore from Time Automobile" from the macOS Utilities menu.
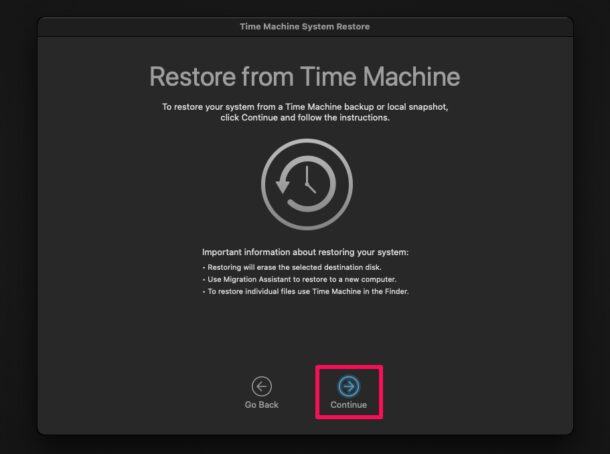
- You lot'll be shown a cursory description of this procedure. Click on "Continue".
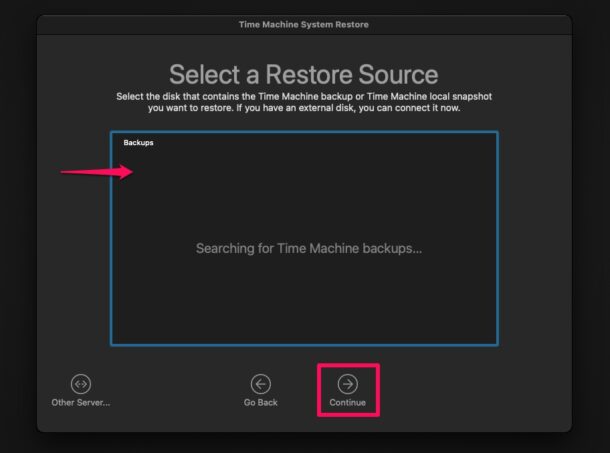
- Now, your Mac will start searching for available backups. Choose the Fourth dimension Machine drive that's connected to your Mac every bit the Restore Source and click on "Continue".
- In the "Select a Backup" screen, cull the most contempo backup from the macOS version you desire to downgrade to. Side by side, select the name of the destination bulldoze to restore the Time Auto backup of macOS to. This should be the same drive that we just formatted completely in Step 7. Now, click "Restore" to begin restoring the Time Machine backup to the selected drive.
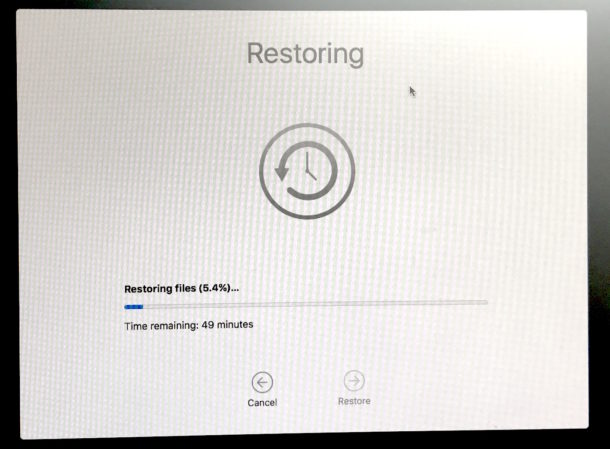
That'due south it. Now, yous but demand to patiently wait until the whole procedure is complete.
Depending on the speed of your Mac's hard drives and the size of the backup, the restoration and downgrade process could take a while.
In one case the restoration is finished, the Mac volition automatically restart and kick directly into the macOS version that was running when the selected Time Car fill-in was made. For instance, if the Time Motorcar backup was made when macOS Catalina was installed, your Mac will reboot into macOS Catalina afterwards restoration, and it will be as you lot left off the last time using Catalina.
Although we were obviously focusing on downgrading from macOS Large Sur in this article, these exact steps tin exist used to downgrade from any version of macOS. The but requirement is that yous demand to take a Time Motorcar backup of your data with the macOS version you lot're looking to downgrade to.
This isn't the only style to downgrade the software on your Mac. You can brand use of the internet recovery method which installs the macOS version that shipped with the Mac, and and then make clean installing a prior macOS release. Don't forget that you'll still need a backup of your data to avoid losing your important files, apps, documents, and other personal data.
We promise you were able to successfully downgrade from macOS Big Sur to macOS Catalina or Mojave without whatsoever hassle. What are your reasons for not wanting to employ macOS Big Sur? Did yous use a different approach, or do yous know any other methods to downgrade your Mac? Let u.s. know your valuable thoughts and share your experiences in the comments section down below.
Source: https://osxdaily.com/2021/01/08/how-downgrade-macos-big-sur-to-catalina-mojave/
0 Response to "Is It Possible to Go Back to Sierra After Uploading Mojave to My Macbook Pro"
Post a Comment